The Power of Light Control
“I might seem like a broken record on how important light control is, but I will continue to say it because I believe in this concept so strongly. Shaping light can add a 3D quality to your image.”
-Shane Hurlbut, ASC Director of Photography
Here at Acme Camera Company we have a plethora of tools to assist you as an artist, the painter of light. Among our arsenal of tools are the Mathews flags, silks and scrims.
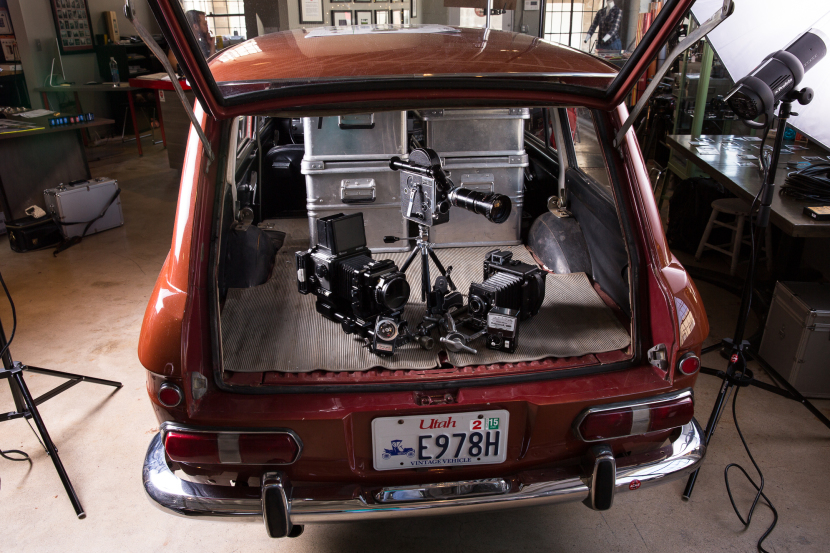
Just the other day I had designed a small shot in the back of our Datsun here at the shop. There were a few problems with the light that I had to solve. The light from the D1 head was spilling all over creating distracting highlights in the background as well as overpowering the Bolex H16 I was shooting. After I had solved the problem with a few flags it looked like I was shooting a small movie scene. It was at this point however, that I realized how powerful and important it is to control your light. In this article I wanted to share my experience with light control and why I believe it is important.
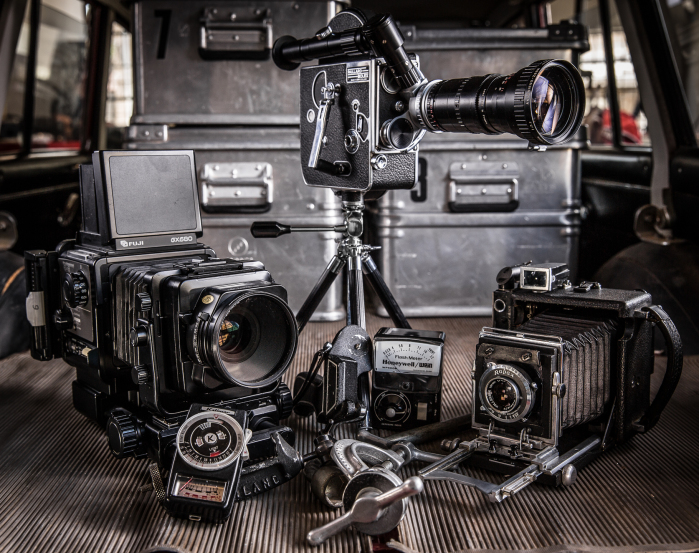
Here is the final image I came up with.
The Shoot
Now these are older cameras I was shooting. The giants, the workhorses, the “A” cams (which by the way are for sale). These guys helped shape our beloved industry into what it is today. I wanted to pay the respect that is due. When you look at these cameras, you can see that they are old, grungy, and gritty. Perhaps they could easily be pictured in grandpa’s attic amidst a pile of junk. However, there is a quality about them that stands out, a shine, if you will. That is the essence I wanted to capture, the story I wanted to tell. The back of the Datsun at Acme served as our environment perfectly.
The image was captured on a Canon Eos 5D Mk III and a Canon 24-70mm 2.8L II. I used a Profoto D1 Air Kit 500 each head shooting into an umbrella placed outside each window to key our products.
When shooting products I prefer to use bounced light as a key rather than straight diffused light. I find the bounced light to be a bit more flattering on the body of products. Sometimes I will go back and throw some diffusion in front of the bounced light as well to create an even softer image. However that would not have served this image well as I was going for a bit of a harder look. With that being said there were a few obstacles I encountered.
Obstacle No. 1
Obstacle No. 2
The second obstacle I encountered was the light spill.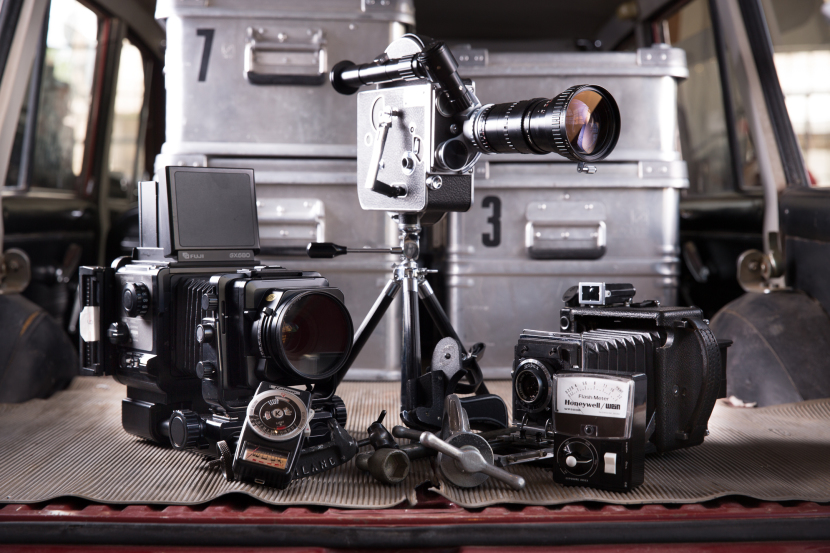
As you can see the Paillard Bolex H16 (center) is pretty hot and clippy as well as the cases in the background. The cases being as bright as they were took too much attention away from the cameras which of course is never good. To solve this problem I rolled out two Mathews 18”x24” Flags and placed them just out of frame to block the light from the spilling all over the tin cases in the BG and direct the light more toward our products.
Okay. That solved half the problem. But one of the fill lights on the Fuji GX680 (left) was spilling too high onto the Paillard Bolex H16 making it too hot.
The other fill light was creating a mean reflection on the tin cases in the BG on the right.
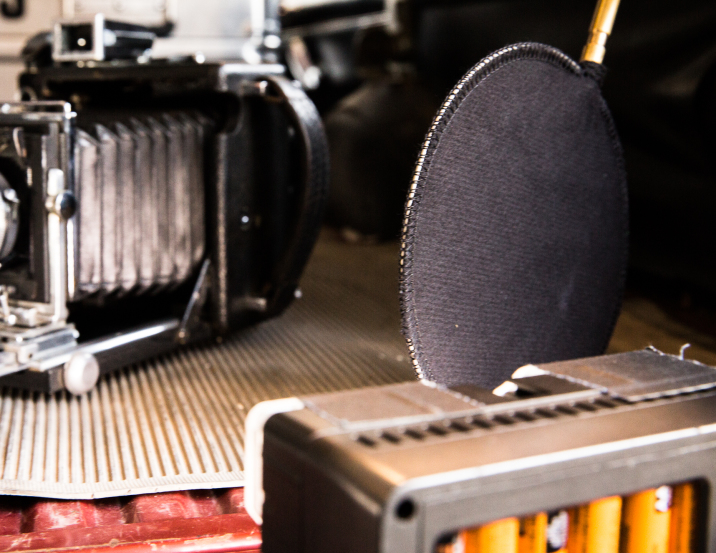
For this I employed a set of tools that I believe to be highly underused in product photography. The Dots and Fingers.
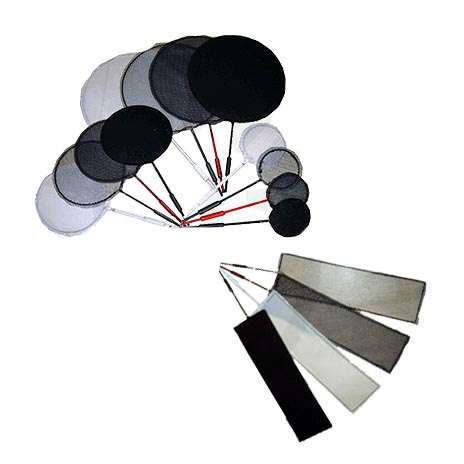
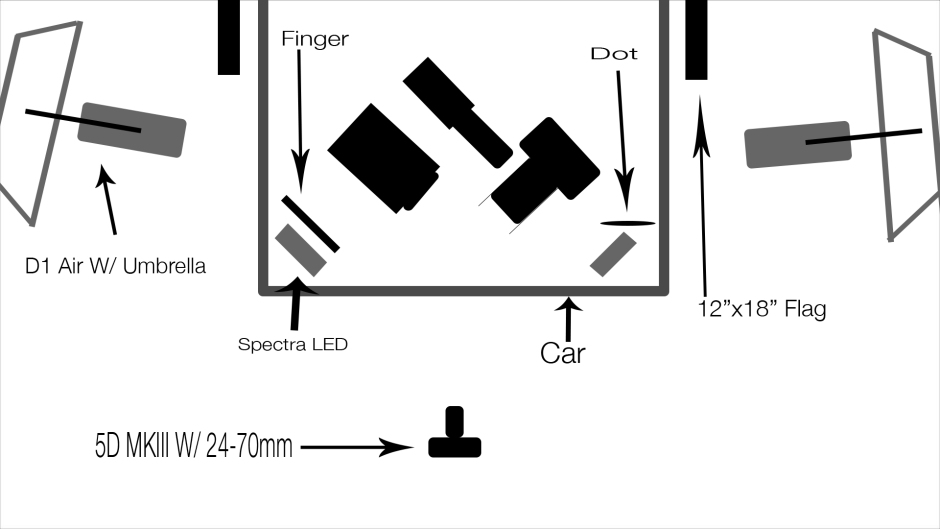
Dots and Fingers
Dots and fingers are pretty much mini flags, cutters, silks and scrims. The circles are known as dots and the rectangles are known as the fingers. I placed a Finger just above the Manfrotto Spectra 900S LED on the left to cut off the light hitting the Bolex. I did the same with the right side except I used a Dot because I found that to be more suitable. Here is a small layout of my setup
Here at Acme Camera we are more than just a rental house with a bunch of cameras and lenses. We are here to serve you in any way possible on your creative journey.
Without these tools I do not believe I could have produced the photo above. Of course, there are always many ways to solve a problem on a shoot. This is one of them. These light shaping tools will not only solve your problems but will also give you creative freedom. You are the artist! These are simply the brushes and pallets to assist you as you make your first stroke on the canvas.
Here are some more photos from the shoot.
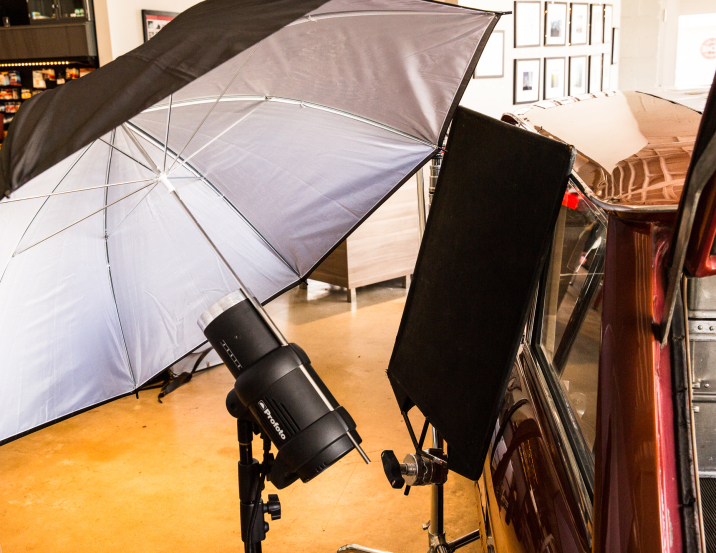
Good ol' fashioned flag on a c-stand.
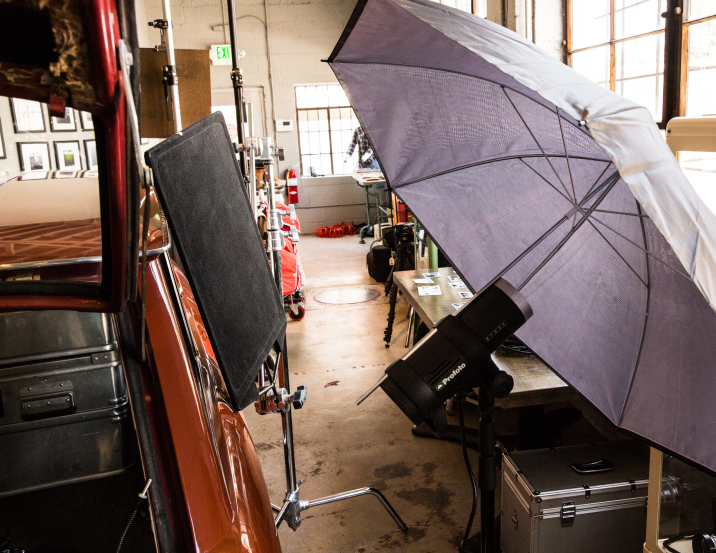
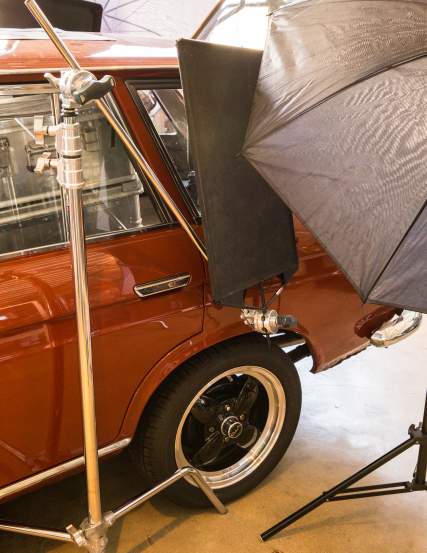
The black side of this Umbrella also served as a flag to block out the unwanted daylight which would otherwise pollute the image.

You don't always need C-Stand to place Finger how you want it. I simply used a Double Grip Head.
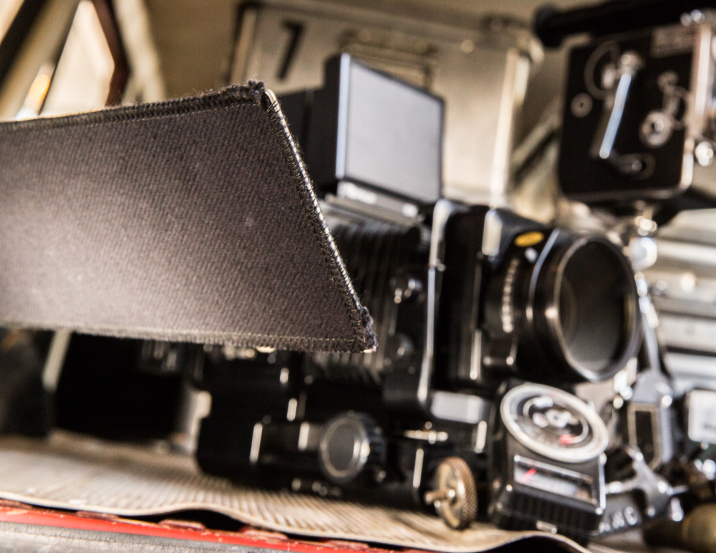
Notice how the Finger flags off the light which would otherwise hit the Bolex H16.
This light had some issues. The Dot really succeeded in blocking light which would otherwise create a nasty highlight in the BG.
Good ol' fashioned flag on a c-stand.
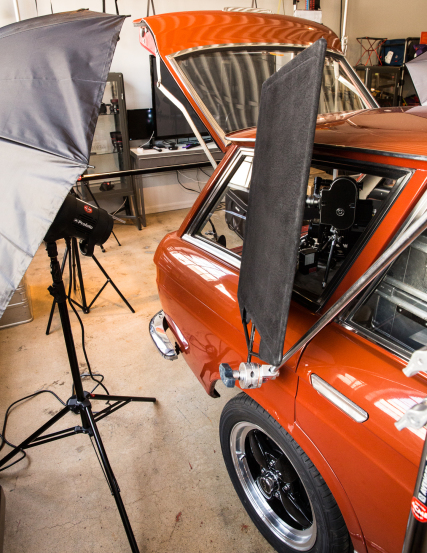
Good ol' fashioned flag on a c-stand.